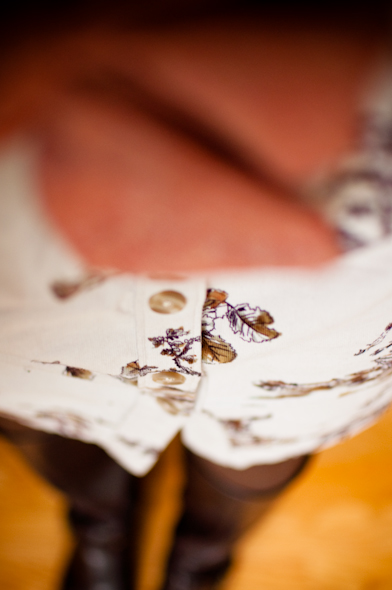
My ironing board was a mess. I think I've had it since college, and in recent years it has been like ironing on metal with a thin, slick cover of canvas. Padding all but gone and the icky blue cover ... not like it was ever top quality in the first place.
So, armed with a surprising burst of industriousness, an old vintage sheet that I forgot I had and some quilting batting that materialized by magic (where did it come from?), I spiffed up the sorry ol' girl.
Unroll the batting on the floor and flip the ironing board atop. Cut around the ironing board leaving a few extra inches so the batting can wrap around. Ditto for the fabric. Then, run a quick seam around the fabric to create a little pocket around the edge in which to run some string through (Tie the string to a big safety-pin, and run the safety-pin through ... much easier).
Now you can place/wrap the batting and fabric on the ironing board and cinch it all up tight with the string. Tie it off and shove the loose strings up under somewhere and tell yourself you'll trim them later, knowing that you'll forget and never will. Voila!
(ps-I took this photo while sitting. Uh-huh, that's right, I was ironing while sitting! Have you all been doing this for years and forgot to clue me in? It's like I never realized I could use it at any height other than tip-top. A definite "shazaam!" moment for me.)
20 July 2012
08 October 2011
Even If You Aren't A Seamstress
Everyone should own a seam ripper. If you sew at all, you already are quite familiar with this little item. A multitude of errors can be undone with a seam ripper.
But even if you can barely sew on a button, you really should have a seam ripper in your stash of odds and ends. They cost about a dollar and can whisk off an icky Target tag in no time.
Just stick the pointy end under one of the stitches until it slices the stitch in half. Work your way down the seam or stitch line. Before you know it that cheapy tag is gone and you haven't harmed your garment at all.
But even if you can barely sew on a button, you really should have a seam ripper in your stash of odds and ends. They cost about a dollar and can whisk off an icky Target tag in no time.
Just stick the pointy end under one of the stitches until it slices the stitch in half. Work your way down the seam or stitch line. Before you know it that cheapy tag is gone and you haven't harmed your garment at all.
04 April 2011
Q & A and Giveaway
My main intent for this blog has been to document the days for my family, a cheater scrapbook of sorts. However, I am always so encouraged (and even a little surprised!) to find out that other people actually read this online journal and find themselves at least mildly interested in our everyday lives and my incessant ramblings.
Over the past couple of years on this blog, I've found myself developing very real connections and friendships even though I've never sat down face-to-face with so many of you or even heard your voice over the phone. But reading about your families and finding your comments or emails in my inbox have become a source of true pleasure for me. An unexpected blessing.
So. What would we chat about over coffee? What kind of questions do you have for me? Children? Schooling? Housework? Faith? What kind of blog posts do you most enjoy? I'll often get individual emails asking about bits and bobs from my life, but I haven't really opened it up to the blog to respond en masse. Go ahead. Ask! You can email me privately or just click 'comments' below. I have a feeling that I'll learn a lot about myself in the process.
And because I'm so curious to read your thoughts or questions, if you leave a comment below by noon, Friday the 8th, I'll drop your name into a giveaway drawing. A little linen zippy pouch with a blue ticking lining and a vintage "lilac" colored zipper. Cheers!
So. What would we chat about over coffee? What kind of questions do you have for me? Children? Schooling? Housework? Faith? What kind of blog posts do you most enjoy? I'll often get individual emails asking about bits and bobs from my life, but I haven't really opened it up to the blog to respond en masse. Go ahead. Ask! You can email me privately or just click 'comments' below. I have a feeling that I'll learn a lot about myself in the process.
And because I'm so curious to read your thoughts or questions, if you leave a comment below by noon, Friday the 8th, I'll drop your name into a giveaway drawing. A little linen zippy pouch with a blue ticking lining and a vintage "lilac" colored zipper. Cheers!
20 December 2010
A Home-Day and Corduroy Happiness
We had to cancel some anticipated plans today in order to stay home and get healthy. Nothing too bad, but throaty coughs and persistent sniffles that just need a day at home.
The result of our self-imposed home-day is plenty of time to work on projects. Christmas cookie dough is chilling in the fridge and a viewing of White Christmas is bringing smiles and spontaneous dance sessions.
It has also brought time to work on some sewing projects all in lovely corduroy. Oh, corduroy. I forgot how much I love you! You are sturdy, soft, washable, and so very sweet. Perfect for dresses for both little girls ... and big girls too.
For you see, I stumbled upon a corduroy dress at the magical Anthropologie. Normally, this is a store I view as fantasy-land and explore it much like one would in a dream or a good novel. However. This time there was a massive clearance sale going on (the kind with a "take an additional 25% off the lowest marked price" ...) and a darling little dress that was cheap. I'm talking Target cheap! The only problem? A size too small.
Humpf. What's a girl to do?
Corner a sales-girl in the dressing room and demand for utter honesty. "Tell me. Does this look like I squeezed myself into a too-small dress? And don't be nice. I mean it. Don't you be sending me out of here looking like a stuffed sausage."
She said it looked good. And then another lady gave an unsolicited comment of approval. And I decided to believe them. So I bought it. (Insert giddy, maniacal laugh ...)
It actually fit nicely in most areas, just too tight in the arm-holes. Not a surprise since I have man shoulders. (I'm serious. I do. Like a burly dock-worker. I'm sure I could haul up a ship's anchor by hand.) No problems moving, sitting, walking ... but if I had to reach upwards or across my chest, the teensie arm-holes with their vicious cap-sleeves would just about sever my offending limbs.
So today I spent a little time deconstructing and widening arm-holes to accommodate my upper-torso beefiness. Ahhh...much better.
Now it's time to get back to work on some sweet corduroy dresses for two little girls who still have very lovely and proportional arms. Here's to hoping that the man-arm genes don't reveal themselves in my innocent progeny. It's a good thing they are learning to sew ...
The result of our self-imposed home-day is plenty of time to work on projects. Christmas cookie dough is chilling in the fridge and a viewing of White Christmas is bringing smiles and spontaneous dance sessions.
For you see, I stumbled upon a corduroy dress at the magical Anthropologie. Normally, this is a store I view as fantasy-land and explore it much like one would in a dream or a good novel. However. This time there was a massive clearance sale going on (the kind with a "take an additional 25% off the lowest marked price" ...) and a darling little dress that was cheap. I'm talking Target cheap! The only problem? A size too small.
Humpf. What's a girl to do?
She said it looked good. And then another lady gave an unsolicited comment of approval. And I decided to believe them. So I bought it. (Insert giddy, maniacal laugh ...)
It actually fit nicely in most areas, just too tight in the arm-holes. Not a surprise since I have man shoulders. (I'm serious. I do. Like a burly dock-worker. I'm sure I could haul up a ship's anchor by hand.) No problems moving, sitting, walking ... but if I had to reach upwards or across my chest, the teensie arm-holes with their vicious cap-sleeves would just about sever my offending limbs.
So today I spent a little time deconstructing and widening arm-holes to accommodate my upper-torso beefiness. Ahhh...much better.
30 November 2010
A Nice Little Tape Pillow
We've been sewing a lot over here. Specifically, a lot of pillows! I've gone crazy with making zippered pillowcases in the last month, and the girls have followed suit. Now that Christmas is upon us and we found some festive vintage fabric, we're revved up for more.
Lucette has been busy with her sewing machine and some scraps of poinsettia fabric. She's produced two pillows and is contemplating more. Not to be left out, Jane rounded up some sturdy corduroy and some scotch tape. I think the craftsmanship is excellent ... and don't you just love the little pocket?
28 October 2010
23 September 2010
Autumnal Pillows in the Family Room
Last year I found just a gob of yardage at the thrift store in an ... Autumnal Medallion Motif! The fabric was vintage but in pristine condition. A nice soft cotton, but still sturdy enough to take some abuse.
After some thought, I made up one cover for a throw pillow just to see if I could live with it's in-your-face declaration of design ... or if it was just too much shazam. The verdict?Now I must promptly commission myself to make at least two more of these darlings. Not like there is dinner to make or chores to be done, right? Pillows are high-priority.
09 June 2010
The Development of a Seamstress
Now that summer break is here, the sewing lessons have commenced and the birthday machine is humming right along. First on the docket? Threading the machine, learning basic vocabulary (bobbin, presser foot, stitch length, seams, etc.), sewing straight and zig-zag lines, and executing the reverse stitch. Lucette is doing so well!
As Lucette worked, Jane helped me turn four pairs of ripped-knee school pants into summer shorts. She was quite helpful in placing the removed pins into the "tomato" (don't we all have one of those pin cushions?), and particularly liked wearing the severed pant-legs as arm warmers.
I'm so glad the sewing enthusiasm seems to be present in my girls. I have many fond memories of sewing lessons at my grandmother's house and how we would giggle when I would forget the "right sides together" mantra and stitch my skirt on backwards. She always had a way of making the mistakes no-big-deal. "We'll just rip it out and start again!"
Yep. That's next on the agenda: an introduction to the seam-ripper. A very necessary tool, indeed.
As Lucette worked, Jane helped me turn four pairs of ripped-knee school pants into summer shorts. She was quite helpful in placing the removed pins into the "tomato" (don't we all have one of those pin cushions?), and particularly liked wearing the severed pant-legs as arm warmers.
I'm so glad the sewing enthusiasm seems to be present in my girls. I have many fond memories of sewing lessons at my grandmother's house and how we would giggle when I would forget the "right sides together" mantra and stitch my skirt on backwards. She always had a way of making the mistakes no-big-deal. "We'll just rip it out and start again!"Yep. That's next on the agenda: an introduction to the seam-ripper. A very necessary tool, indeed.
04 February 2010
Jackpot!
Oh my heavens, could you imagine the state of zipper nirvana I entered when I came upon more than 60 vintage zippers at the thrift store? I was greedily snatching them off the shelves as though there were hoards of manic seamstresses behind me, just waiting to pounce.
Color names like Flamingo, Mystic Blue, Poppy, Cloister Brown, Peacock, and Barberry Red. Not to mention the technology represented! Flex-Coils, Boiltex Tapes, and even the ability to Magically Self-Heal.Sigh. The simple joys always get me.
23 January 2010
An Original
14 January 2010
In the Sewing Room
A while back I culled the children's toys, placed the remainder in their rooms and took over the spare bedroom -- all with a greedy giggle and complete lack of remorse. What luxury to have a work room! Lots of endeavors take place in this room, but mostly my sewing.
I picked up a well-loved (read: slightly beat-up) 1950's yellow-marbled formica drop-leaf table for pattern cutting, set up some shelves for fabric and plunked my machine on a Costco fold-up table. Works very nicely.
I'm a sucker for old sewing books and recently nabbed this Better Homes & Garden binder. The color photographs in this one remind me of every snapshot of my early childhood, as they all have a deep golden-orange hue. Certainly makes a statement ... of some kind!
Look at this late 60's/early 70's sewing haven. Must have been chic perfection! While I am perfectly content with my current room set-up, I do find myself dreaming of spiffing the room up a bit. Granted, my visions are not quite as bold as the above!
Of course this guide is also full of practical suggestions. I'm thinking of bringing back the "shift" dress code in my wardrobe. Functional and chic, if you ask me.
And, the book wouldn't be complete without instructions for slip-covering your davenports and adding "perky trims" to little girl dresses.
I'm itching to try some of the patterns and suggestions. Wherever do I begin?
I picked up a well-loved (read: slightly beat-up) 1950's yellow-marbled formica drop-leaf table for pattern cutting, set up some shelves for fabric and plunked my machine on a Costco fold-up table. Works very nicely.
I'm a sucker for old sewing books and recently nabbed this Better Homes & Garden binder. The color photographs in this one remind me of every snapshot of my early childhood, as they all have a deep golden-orange hue. Certainly makes a statement ... of some kind!
Look at this late 60's/early 70's sewing haven. Must have been chic perfection! While I am perfectly content with my current room set-up, I do find myself dreaming of spiffing the room up a bit. Granted, my visions are not quite as bold as the above!
Of course this guide is also full of practical suggestions. I'm thinking of bringing back the "shift" dress code in my wardrobe. Functional and chic, if you ask me.
And, the book wouldn't be complete without instructions for slip-covering your davenports and adding "perky trims" to little girl dresses.I'm itching to try some of the patterns and suggestions. Wherever do I begin?
04 January 2010
A Friend Indeed
Found a dear little piece of needlework that just didn't seem happy in it's frame. While lovingly crafted, it had made it's way to the thrift store and just seemed a touch out of date. Stuck in a frame, it looked a bit fuddy-duddy rather than kitchy-cute.
I would have liked to meet these two.
Ethel placed this piece of needlework in the frame with such purpose, I wondered if I'd ever release it from it's gilded bonds. No less than 27 nails held this darling to the frame!
Inspired by other such re-creations I've spied out in blogland, the handiwork is now backed with vintage yellow calico, trimmed with handmade bias piping, and stuffed with fresh batting, I think Ethel and Margaret's friendship lives on in a sweet, new way.Sitting in the shop (along with some new zippy pouches!) waiting for a new friendship to place claim. Friends are a good, good thing, no?
**As a side note, three cheers to Jane who took the top photo! Camera atop a tri-pod, Jane atop the first step of the staircase, and a quick lesson in pressing the big silver button. I like having cute little minions to do my bidding!
28 December 2009
A Flighty Little Skirt
And what young girl wouldn't want to be Little Bo Peep? Yesterday, I dove into my new Christmas sewing book, and fell in love with Anna Maria Horner's Bo Peep skirt. Using just two large rectangles for the front and back, one (cut in half) for the sides, four small rectangles for the side ruffles, and some scraps for edging, it's just the thing to whip up on a lazy Sunday.
I had all of the fabric in my stash already. A thrifted yellow bedsheet, lush and sturdy turquoise cotton, turquoise calico once used to make a blouse for my mother, and some flighty little butterflies.
I chose a contrasting apple green thread just for the fun of it and used french seams on the interior. I had forgotten how lovely they are. So professional looking.
And since I had already done some butterfly embroidery but was just waiting to find the perfect application, we stitched it on in a lovely deconstructed fashion.All in all I was quite pleased. In the words of Lucette: "It's kinda' funky ... but I like it!"
15 December 2009
Snowstorms and Soft Trees
Last year at this time we had a big snow. In our area, anything more than a few inches causes quite a kerfluffle, and we had over 3 feet that was thickly frosted with ice. The "Arctic Blast of 2008" really was quite newsworthy.
Needless to say, all of our ill-equipped vehicles lent to a cozy snowed-in existence for a solid week. While we did enjoy ourselves quite thoroughly, the term stir-crazy did find it's application from time to time.
When I found myself in such a state and tumbled upon these soft tree instructions, I just had to make myself a few. Or a dozen.
Unfortunately for Pops' wool sweater, it was the only green fabric I had on hand. "It has a moth hole and he complains it is much to hot," I justified to myself. "And really, this red and white shirt has a stain I've never been able to get out." Snip, snip, stitch, stitch, and a happy family of plush trees was born.
Personally, I love the reincarnation and my Seuss-like forest. And if the snows decide to storm again this year ... I make no promises to Pops' wardrobe.
Needless to say, all of our ill-equipped vehicles lent to a cozy snowed-in existence for a solid week. While we did enjoy ourselves quite thoroughly, the term stir-crazy did find it's application from time to time.
When I found myself in such a state and tumbled upon these soft tree instructions, I just had to make myself a few. Or a dozen.Unfortunately for Pops' wool sweater, it was the only green fabric I had on hand. "It has a moth hole and he complains it is much to hot," I justified to myself. "And really, this red and white shirt has a stain I've never been able to get out." Snip, snip, stitch, stitch, and a happy family of plush trees was born.
Personally, I love the reincarnation and my Seuss-like forest. And if the snows decide to storm again this year ... I make no promises to Pops' wardrobe.
14 December 2009
Jane in Lilac Flannel
The girls were dreaming of new flannel nightgowns. How can a mother refuse? Jane was to be first, made up in lilac flannel with little pink roses.
I used the same pattern from last year but expanded the pattern margins by about a quarter inch and dropped the sleeve and skirt and hemline to allow for growth. Nightgowns are rather forgiving in the fit.
We added some lace trim,
a creamy pink button from Great-Mother's button tin,
and didn't skimp on the gathering for the puffed sleeves. Oh, little girls are so delicious to dress.
03 December 2009
Sweaters for the Windows
We have some drafty old windows. Particularly at the front of the house where the girl's bedroom faces. Pops went up to tuck them in for bed the other night and was grossly disturbed at the freezing air that leaked in at the windowsill. So much so, he decided to take matters into his own hands. Next thing I knew, horror upon horrors, he had the packing tape out and was taping the window frame to the windowsill at the seam. Packing tape!The nice thing about having a husband who isn't particularly motivated by aesthetic is the free reign I get over decorating the house. The bad thing? Incidents with tethered toothpaste, crepe paper attached to the walls with a staple gun (Yes. That actually happened.), or windows that get taped shut.
Since solving the window problem as if it were a UPS package simply insults my sensibilities (Sorry, Honey), I had to come up with something else. To the rescue? Giant dry rice window snakes. Rummaging around in my stash of fabric I found some old flannel to make a liner and some teal wool to slide over top like a long, cozy sweater. A few seams with the machine, funnel in some dry rice (A whopping six pounds, it took!), and there we go.
Snuggled up against the window on the sill, everything is much, much better. Incidently, Jane, my pet-deprived daughter, has found great affection for them and has named the woolen snakes "Juju-bee" and "Pinbird." Well, okay then! All is well once more.
01 December 2009
Mad for Plaid
Between the arrival of the Christmas season and my newly purring sewing machine, I just can't stop myself!
I'd been wondering what to make out of this delicious plaid wool yardage from Grandma's stash. First came some coasters backed with a happy holly-red chambray. No longer will my magazines be abused by drippy mugs! And aren't they cute? While unintentional, I like the flirty upbend at the corners.
And then came the zippy pouches. I almost don't want to put these in the shop they are so cute! Vintage metal zippers and a little tabby at the edge.
Wouldn't they even be cute as a little holiday handbag? I'm picturing a trip to the coffee shop with with a fluffy cream scarf and this little honey to stash a bit of cash, Christmas list and pen, and a cheeky tube of lip gloss. Anyone want to meet me for a cappuccino?
I'd been wondering what to make out of this delicious plaid wool yardage from Grandma's stash. First came some coasters backed with a happy holly-red chambray. No longer will my magazines be abused by drippy mugs! And aren't they cute? While unintentional, I like the flirty upbend at the corners.
And then came the zippy pouches. I almost don't want to put these in the shop they are so cute! Vintage metal zippers and a little tabby at the edge.
Wouldn't they even be cute as a little holiday handbag? I'm picturing a trip to the coffee shop with with a fluffy cream scarf and this little honey to stash a bit of cash, Christmas list and pen, and a cheeky tube of lip gloss. Anyone want to meet me for a cappuccino?
20 August 2009
A Very Crafty Bunch
I had thought it to be a little too difficult for her. Once again, I'm learning not to underestimate Lucette. Her back-stitch is truly marvelous.
And her concentration fierce.
Jane is tackling her own embroidered kitty. It's a very vibrantly yellow "Chinese kitty." As a not-quite-4-year-old, she is doing remarkably well. I love her willingness to do her best, even if it looks different than someone else's best.
Peter was actually curious, too. I didn't have any more embroidery hoops (Perhaps a rocket pattern for later?), so he contented himself with making camouflage yo-yo's. I imagine they'll soon find themselves launched by one of his many apparati.What a pleasant afternoon we've had.
11 August 2009
Zippy Pouch Tutorial
I find these little zippy pouches to be a most gratifying project. Very simple, quick, and a fun way to use up cute scraps of fabric. Since I plan on making more, and you might like to also, here is a simple tutorial to keep the steps right at hand. Let's get started!
You will need 4 pieces of fabric (two for outside, two for lining) and a zipper of whatever length your cut fabric is. (I love thrifting vinyl zippers. Nice and cheap, and you can cut them to size!)
Next, sandwich a right-side up zipper with a right-side up lining and a right-side down outer. Stitch across, close to zipper.
Flip fabrics so zipper selvedge is now inside. Repeat these two steps on the other side.
Looking good so far? If you'd like to top stitch close to the zipper, now's the time. You don't have to, just if you like the tailored look.
Flip fabrics so right-sides face each other, outer to outer, lining to lining. (Don't forget to un-zip the zipper at least halfway so you can turn it once it is all stitched!) Pin around the edges, turning zipper teeth and seams towards the lining.
Stitch all around the edges (about 1/4 inch) leaving a 2-4 inch opening at the bottom of the lining. Clip corners.
Turn so that right-side fabrics are now out. Stitch lining opening closed. A slip stitch by hand is always the prettiest, but I usually just run a machine stitch all the way down, very close to the seam.
Tuck the lining into the shell, give it a good press with a hot iron, and Voila! A nice little zippy pouch for you.
You will need 4 pieces of fabric (two for outside, two for lining) and a zipper of whatever length your cut fabric is. (I love thrifting vinyl zippers. Nice and cheap, and you can cut them to size!)
Next, sandwich a right-side up zipper with a right-side up lining and a right-side down outer. Stitch across, close to zipper.
Flip fabrics so zipper selvedge is now inside. Repeat these two steps on the other side.
Looking good so far? If you'd like to top stitch close to the zipper, now's the time. You don't have to, just if you like the tailored look.
Flip fabrics so right-sides face each other, outer to outer, lining to lining. (Don't forget to un-zip the zipper at least halfway so you can turn it once it is all stitched!) Pin around the edges, turning zipper teeth and seams towards the lining.
Stitch all around the edges (about 1/4 inch) leaving a 2-4 inch opening at the bottom of the lining. Clip corners.
Turn so that right-side fabrics are now out. Stitch lining opening closed. A slip stitch by hand is always the prettiest, but I usually just run a machine stitch all the way down, very close to the seam.
Tuck the lining into the shell, give it a good press with a hot iron, and Voila! A nice little zippy pouch for you.
Subscribe to:
Posts (Atom)